


Step 1: Upload Your Image
Upload your image by clicking “Open Image” or simply drag and drop your photo into the editor.

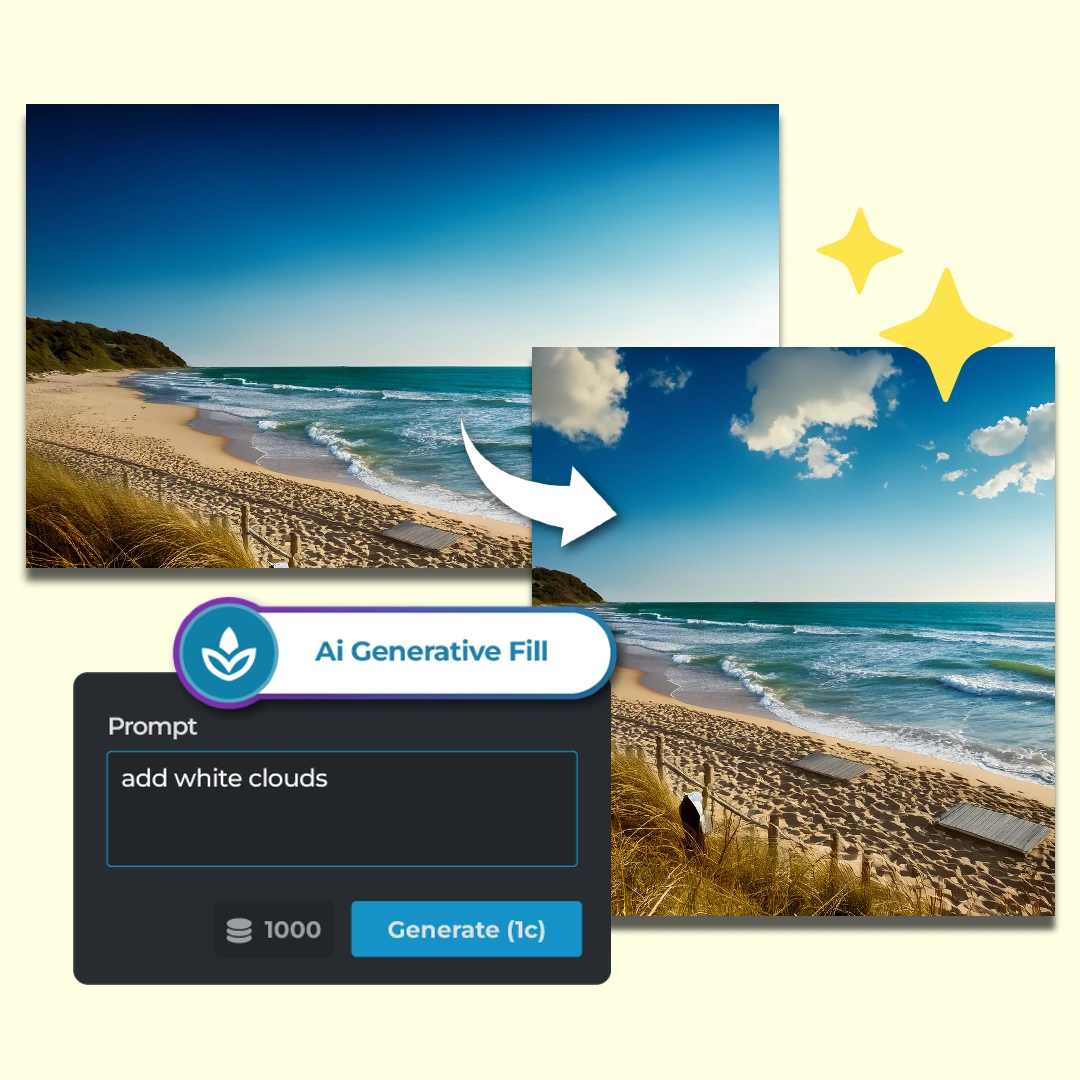
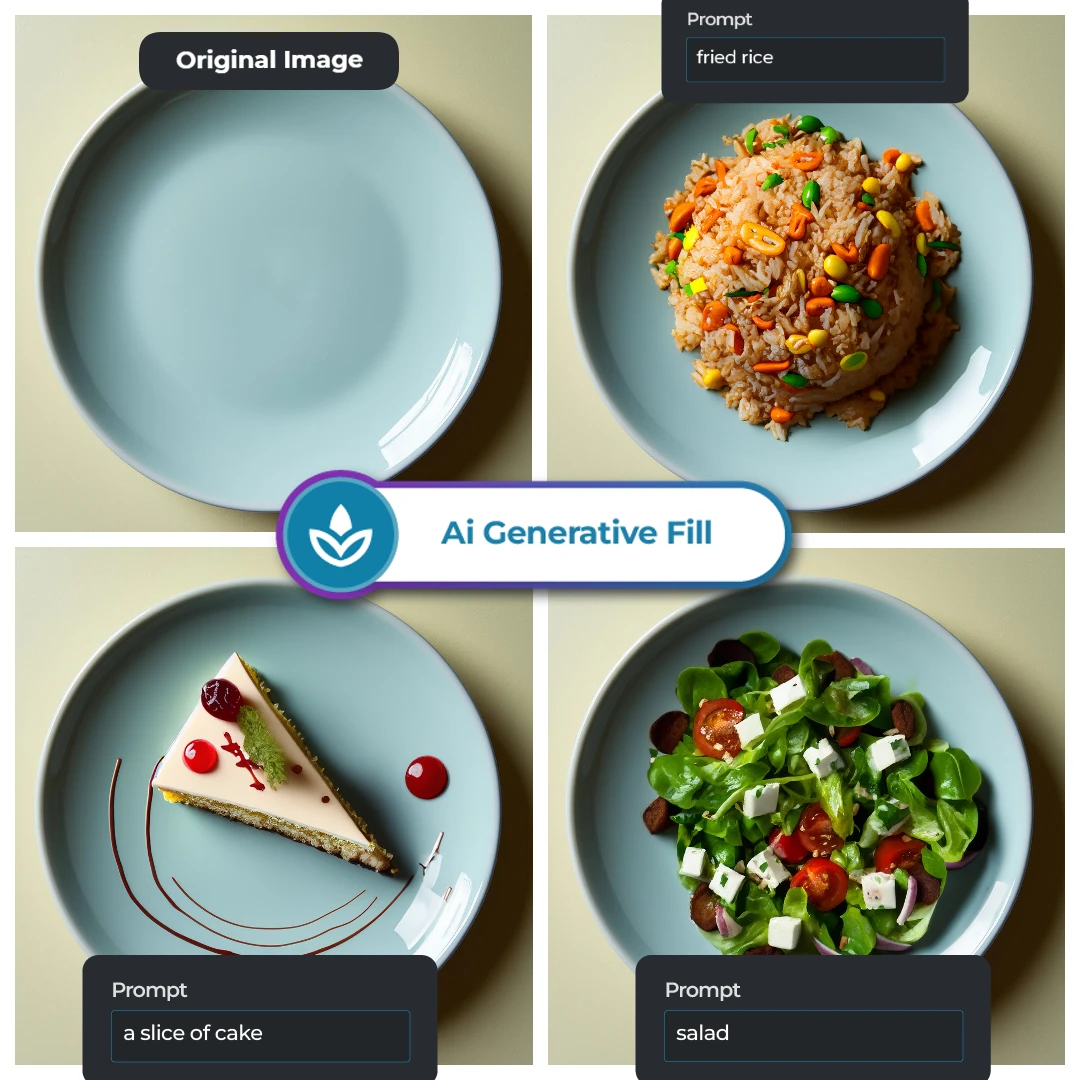
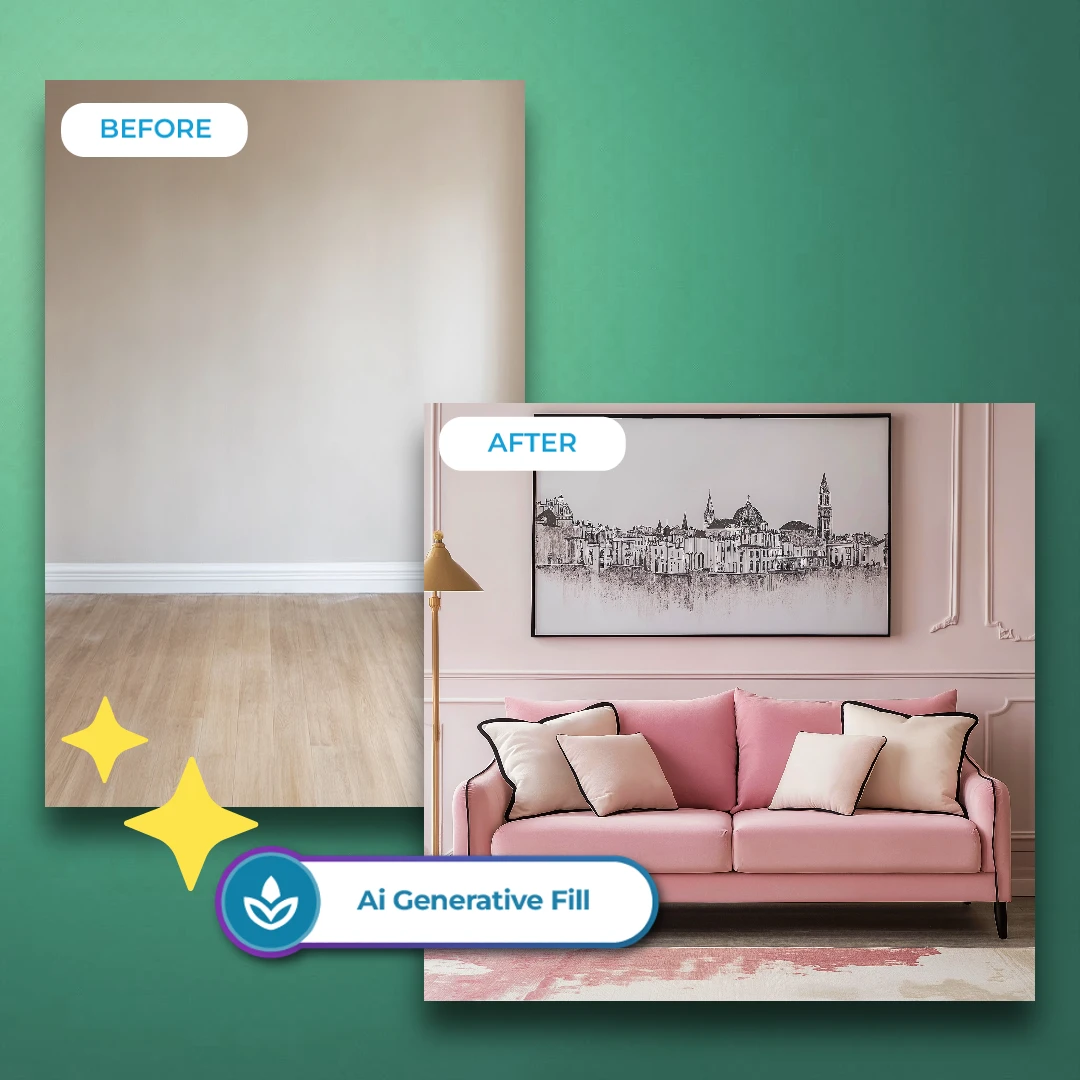
Elevate your photos effortlessly with Pixlr's AI Generative Fill. Seamlessly add, remove, or modify elements in your images using simple text prompts. Save hours of manual editing while achieving flawless results.
Upload your image by clicking “Open Image” or simply drag and drop your photo into the editor.
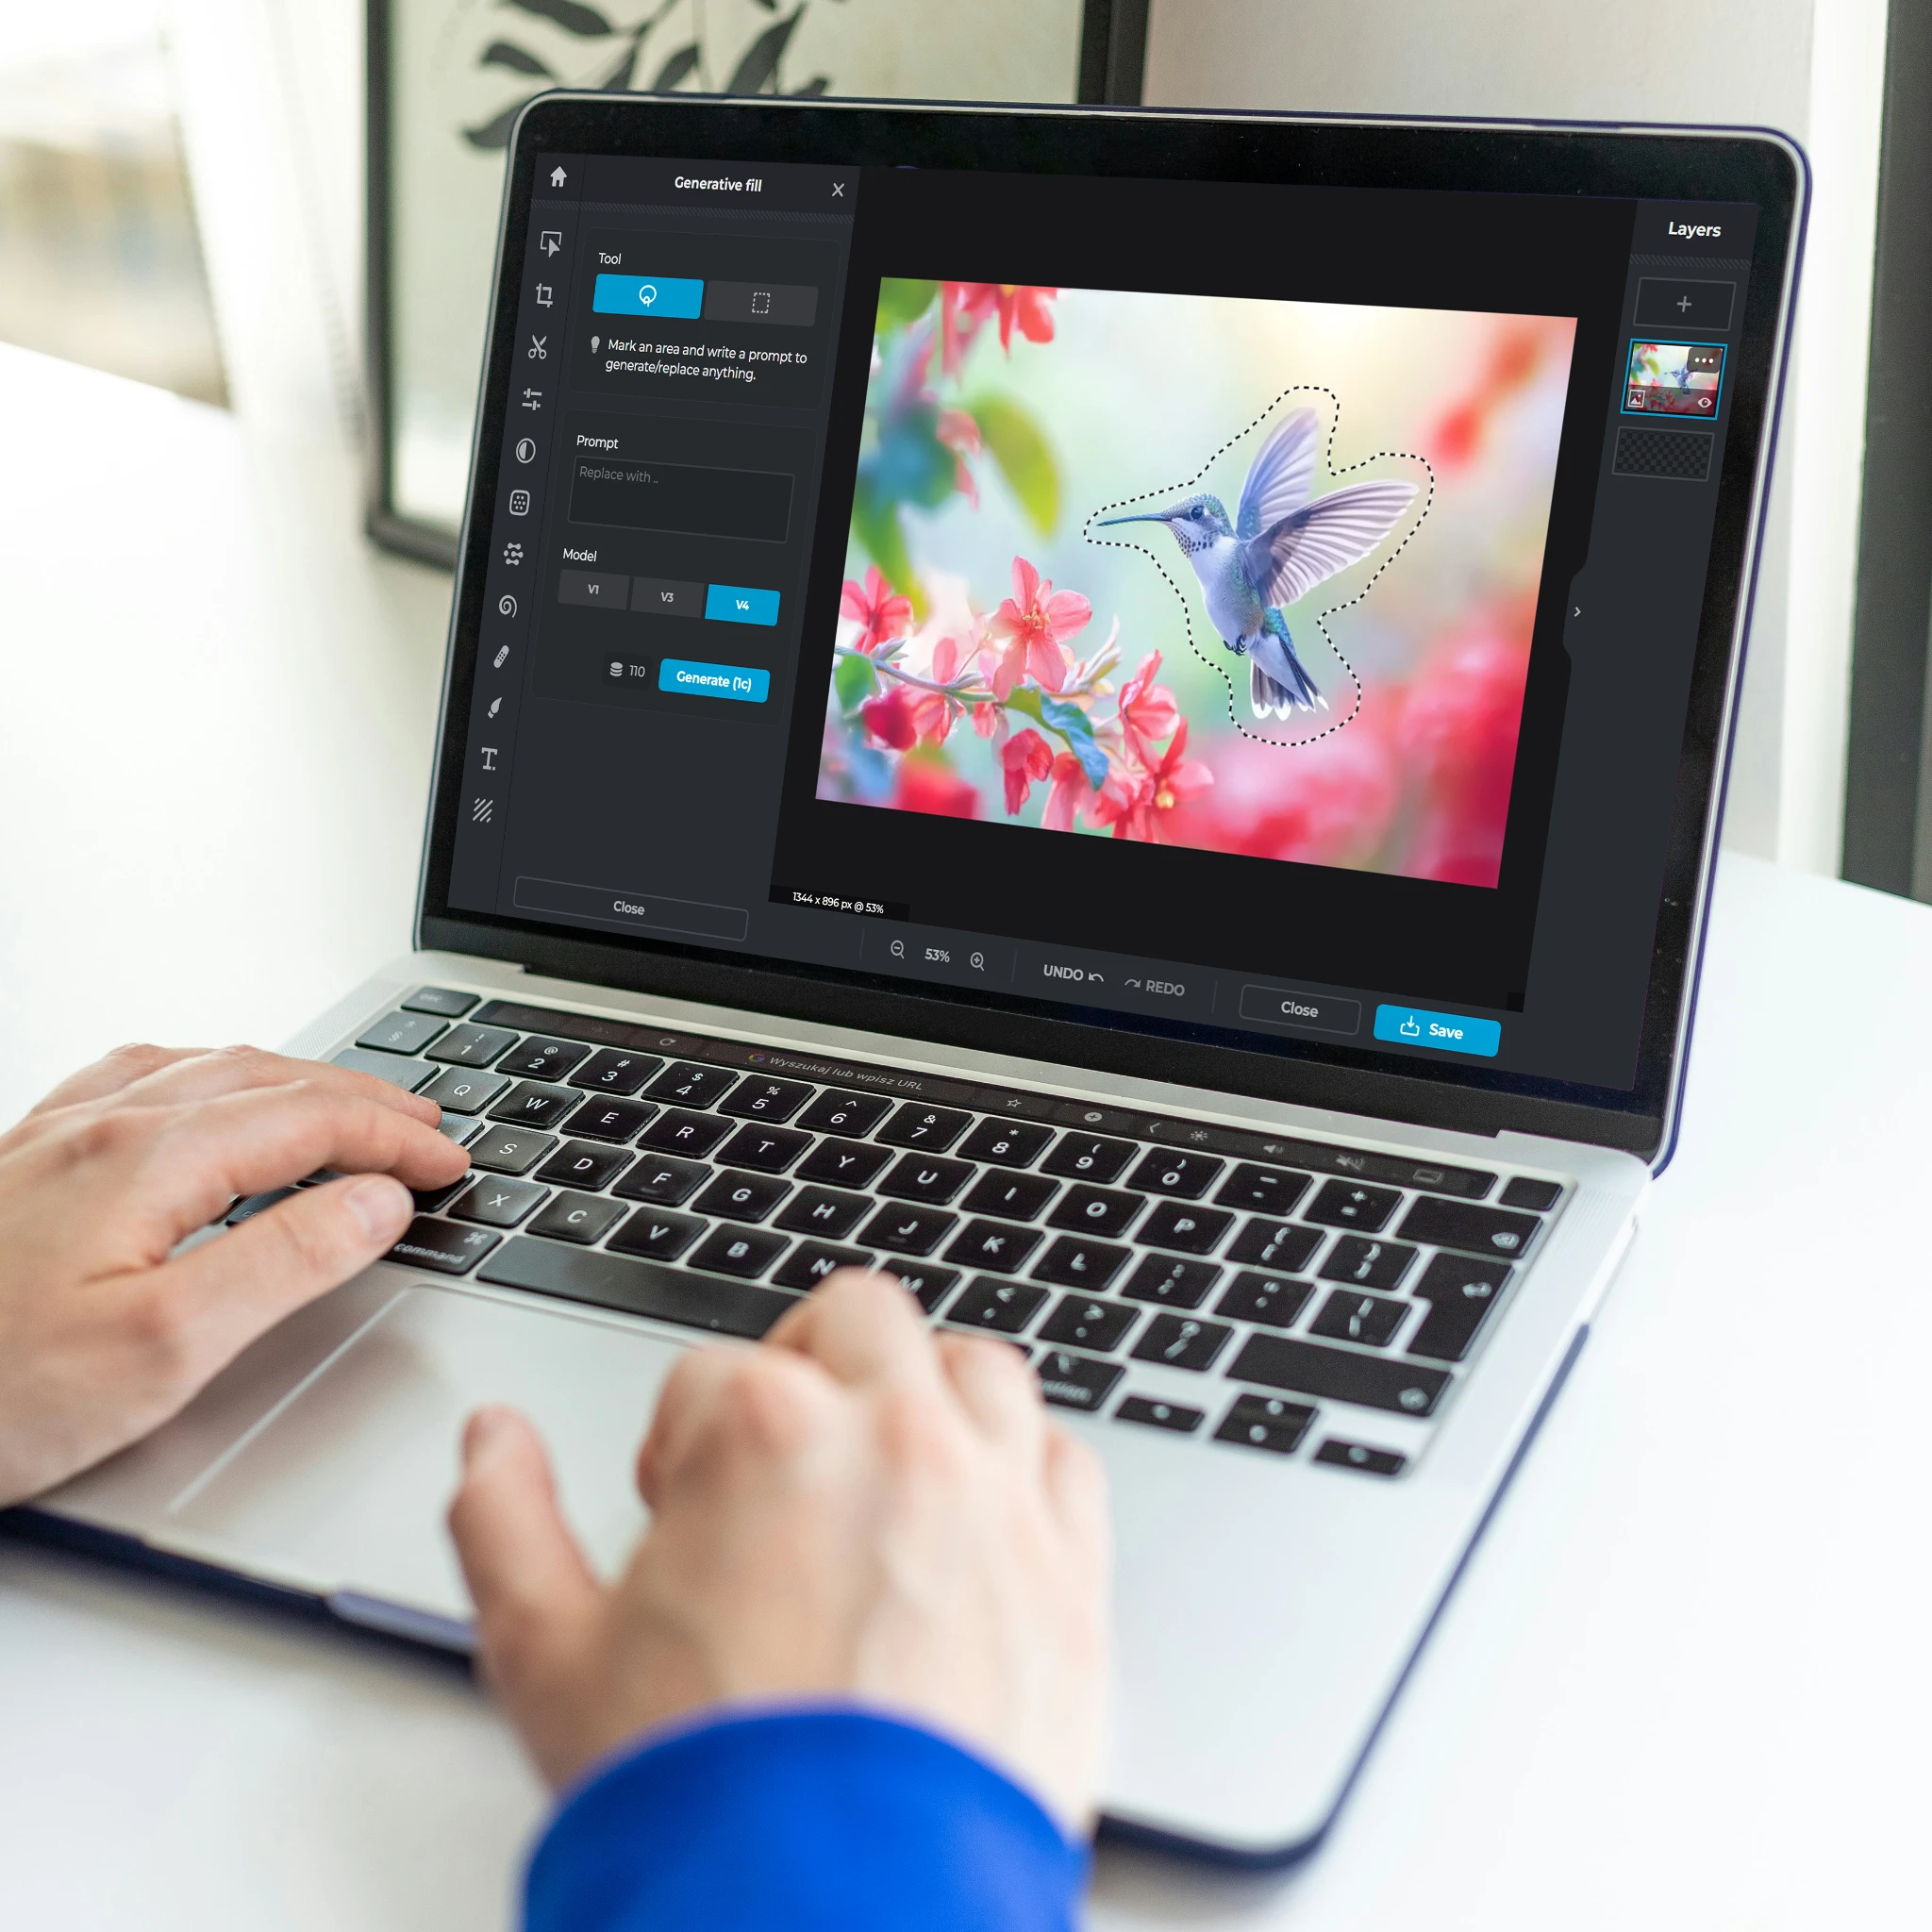
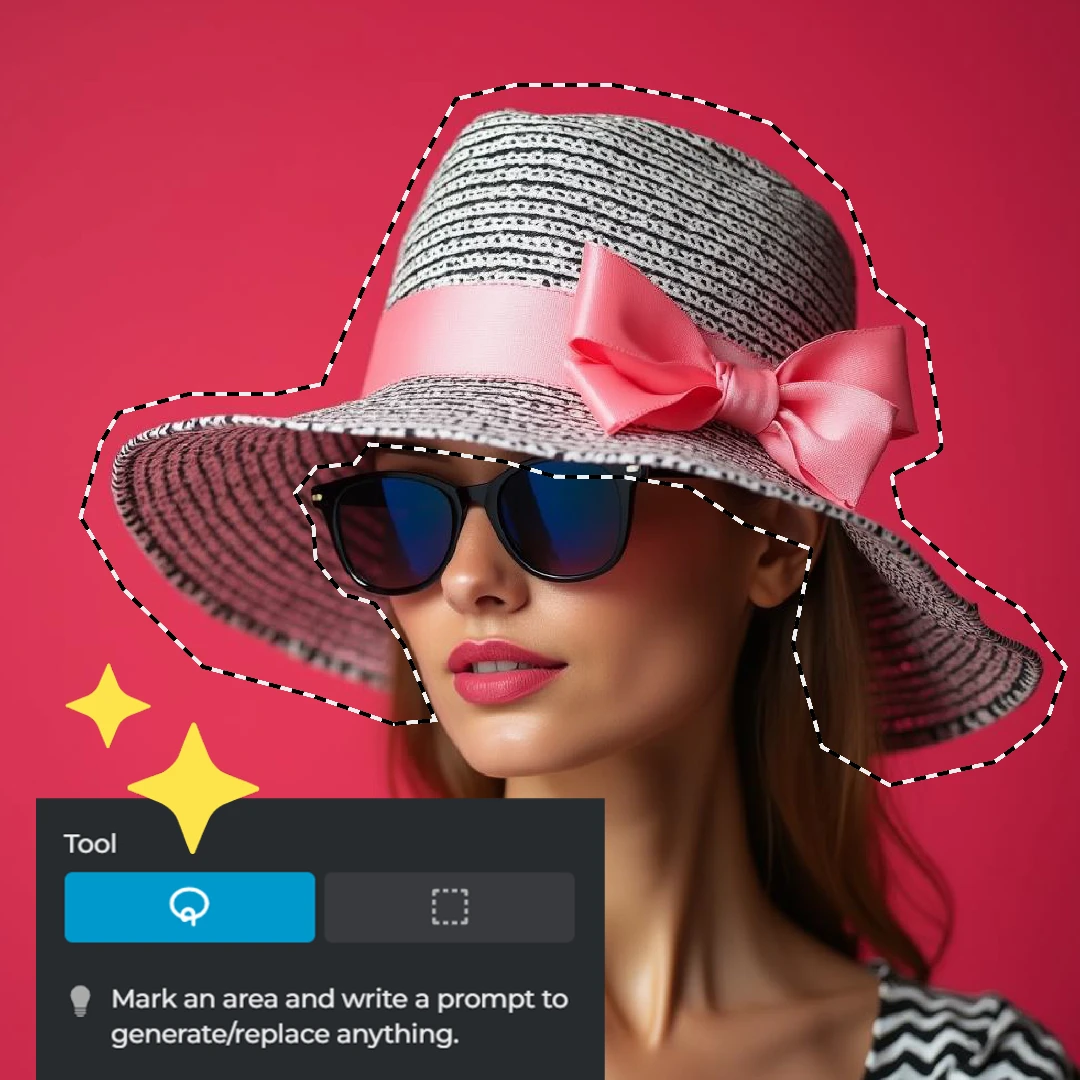
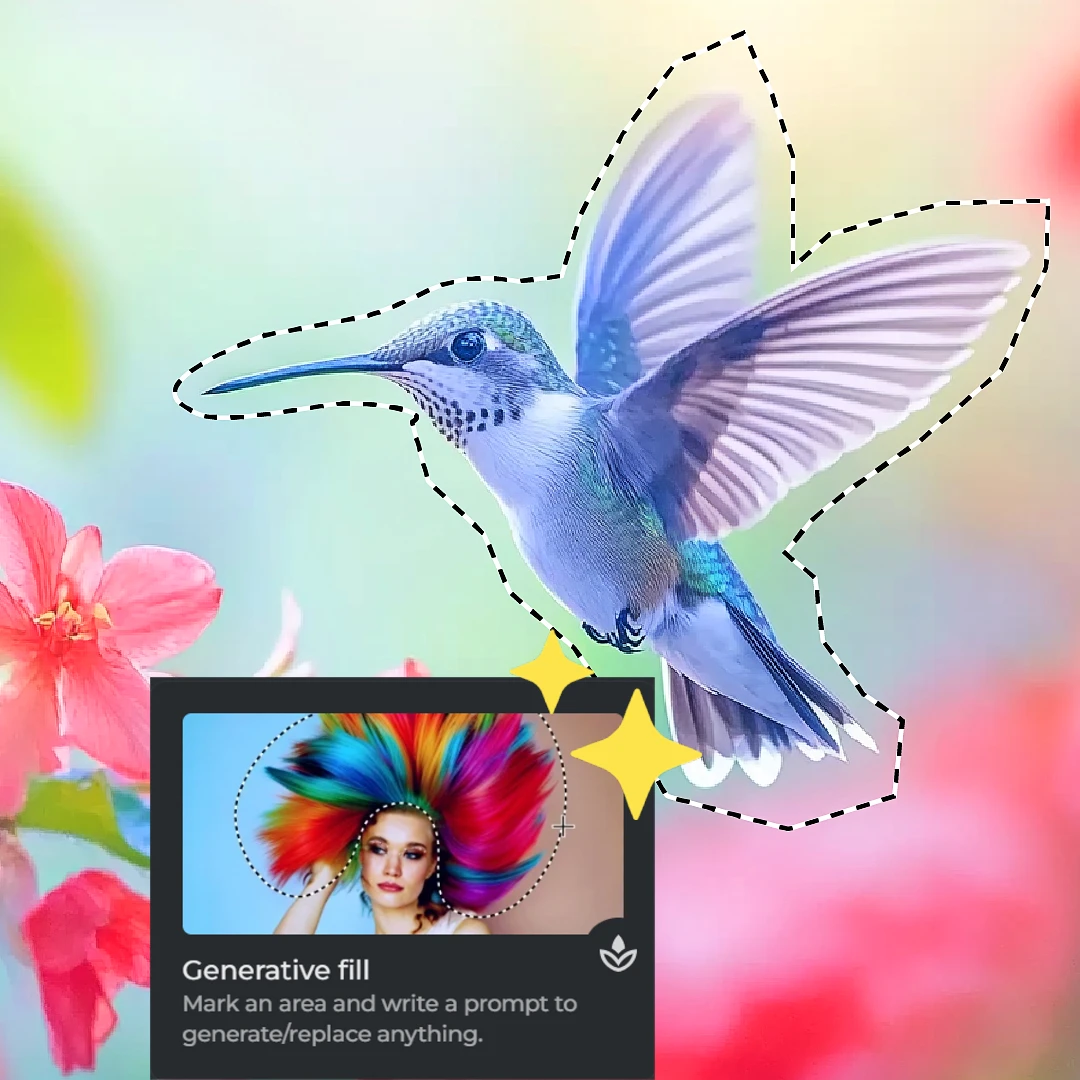
Use the lasso tool for freeform selection or the square tool to drag and select the area you want to modify.
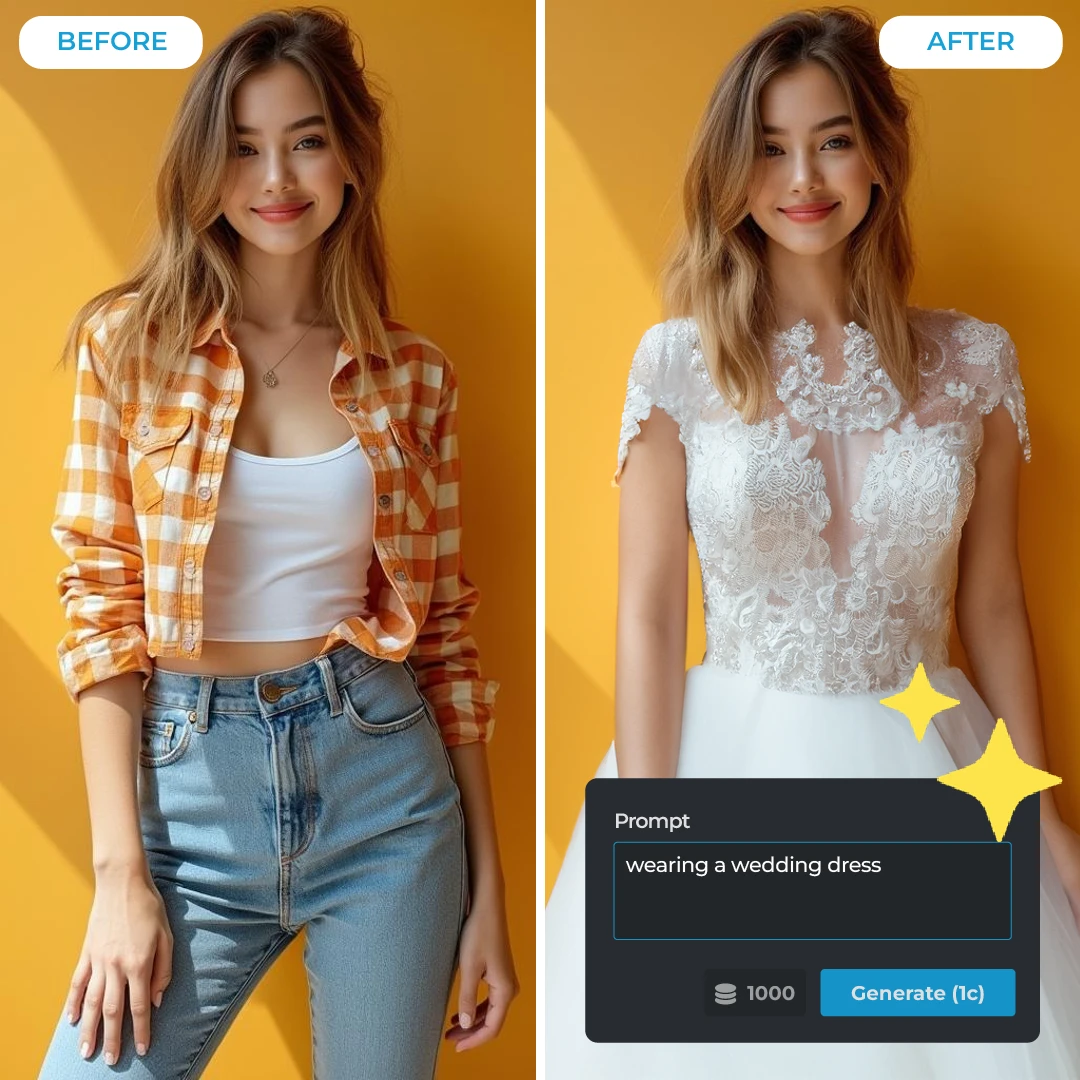
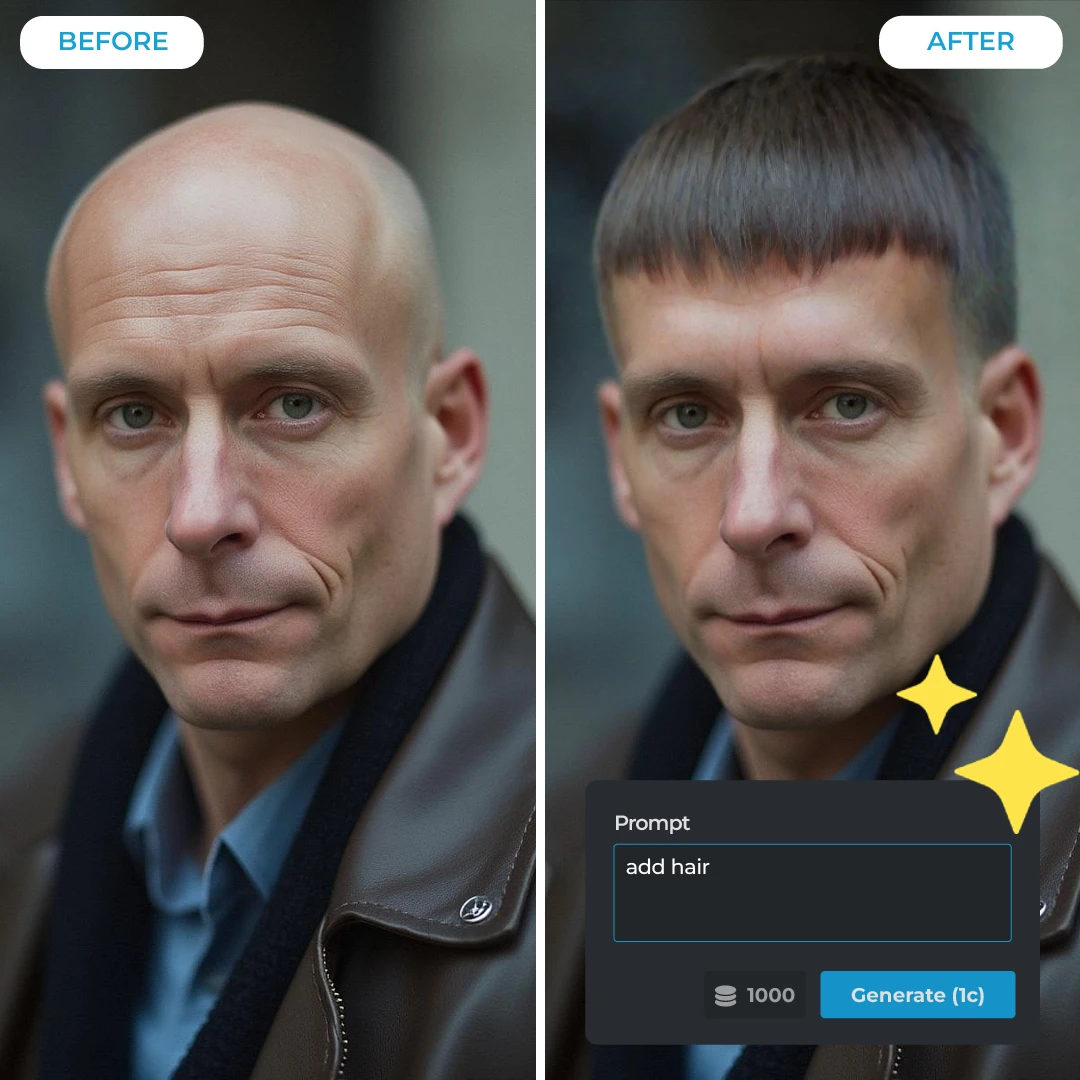
Enter a text prompt describing your desired change (e.g., "add white clouds"), click “Generate,” and review the outputs.
Adjust the image size and quality using the slider or preset options and save your image in JPG, PNG, PDF, WebP, or PXZ format.
Pixlr's AI Generative Fill Tool offers unparalleled flexibility, allowing you to refine and perfect your images continuously. With the ability to precisely select areas, you can easily mark exactly what you need to change in your image. Choose from three different AI models, each providing unique outputs, ensuring that your final result aligns with your vision. This flexibility empowers you to tweak and adjust your edits until everything looks just right, achieving a level of perfection that sets your work apart.
Mastering image editing can be tough, but with Pixlr’s AI Generative Fill Tool, you can easily overcome the challenges. With AI Image Adjustments, you can enhance your photos effortlessly without needing advanced editing skills. Just imagine what you want to see in your photo, mark the area, tell the tool, and it will bring it to life. Whether you need to add, remove, or modify objects in your image, Pixlr’s AI Generative Fill takes the manual work out of editing, reducing the learning curve and allowing you to focus more on creativity.
Time-consuming edits are a thing of the past with Pixlr’s AI Generative Fill Tool. This advanced tool is designed to enhance your efficiency and productivity by automating complex edits. Simply select the area you want to edit, input your text prompt, and let the AI do the heavy lifting. The entire process takes less than 10 seconds, providing you with a quick and efficient way to reconstruct your images. For users without experience in complex design software, this tool allows you to focus on creativity without getting bogged down by technical details.
Pixlr’s AI Generative Fill Tool offers the convenience and accessibility you need to work on your projects from anywhere, at any time. As a cloud-based tool, it requires only an internet connection and a web browser, eliminating the need for complex software or hardware installations. Whether you’re at home, in the office, or on the go, Pixlr’s platform ensures that advanced image editing is always within reach. This seamless accessibility allows you to work flexibly, ensuring you can meet deadlines and bring your creative ideas to life without location constraints.
Despite its advanced capabilities, Pixlr’s AI Generative Fill Tool is designed with user-friendliness at its core. The intuitive interface makes it easy for both beginners and professionals to navigate the tool without any technical knowledge. Selecting areas with the lasso or square tools and inputting text prompts is straightforward, ensuring you can start editing with minimal learning curve. Whether you're new to image editing or a seasoned pro, Pixlr’s AI Generative Fill Tool provides a seamless experience, making advanced image editing accessible to everyone.
With Pixlr’s AI Generative Fill Tool, achieving high-quality, seamless edits is easier than ever. The AI meticulously analyzes patterns, textures, colors, and structures in your image to generate fills that blend perfectly with the original content. This ensures that every edit looks natural and professional, maintaining the high standards of quality you expect from your work. Whether you're completing an intricate design or making subtle adjustments, Pixlr’s AI Generative Fill guarantees polished, cohesive results that stand out.
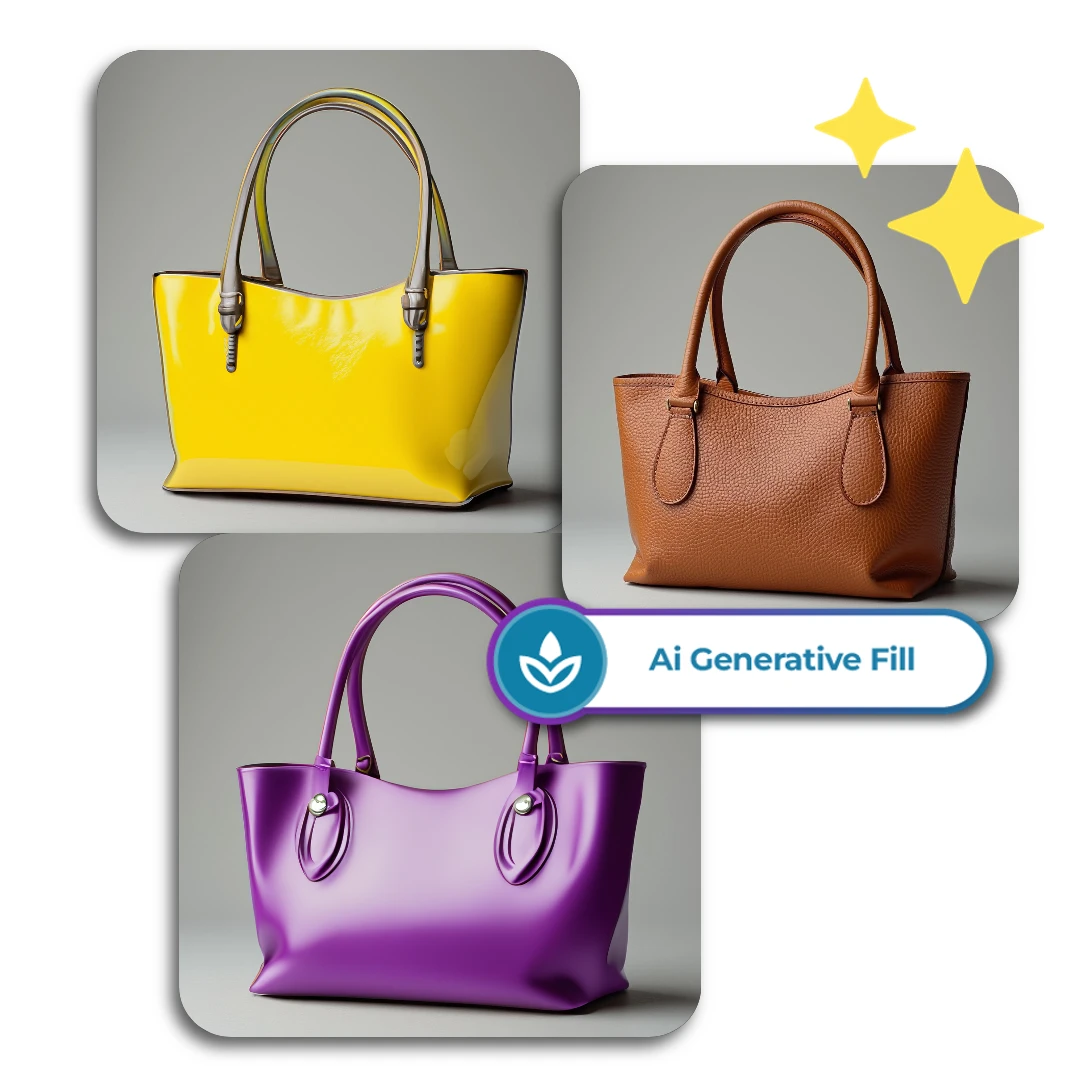
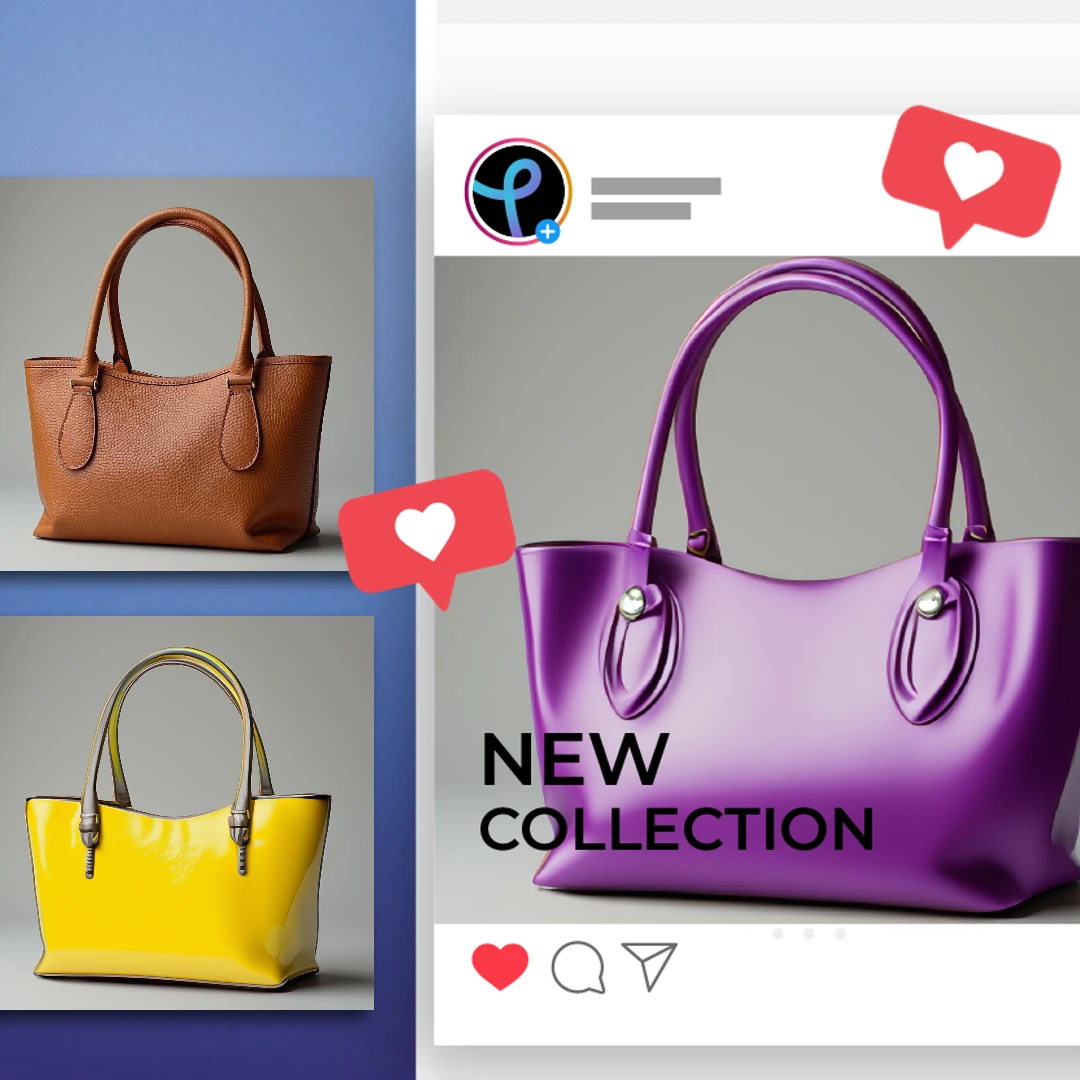
Use AI Generative Fill to turn studio shots into lifestyle images and create multiple color variants from a single product photo. Select product areas and add real-life backgrounds to make products feel more relatable, driving sales. You can also change product colors without extra photo shoots, saving time and costs. A home décor brand could place a lamp into a living room scene, while a fashion retailer might show different handbag colors, like red or blue, making choices easier for customers.
Use AI Generative Fill to stage empty rooms with furniture and refresh outdated interiors by replacing old elements with modern features. This helps buyers visualize the space and increases property appeal. A real estate agency could furnish an empty living room, while a developer might update a kitchen with modern countertops and cabinets, making the property feel more current.
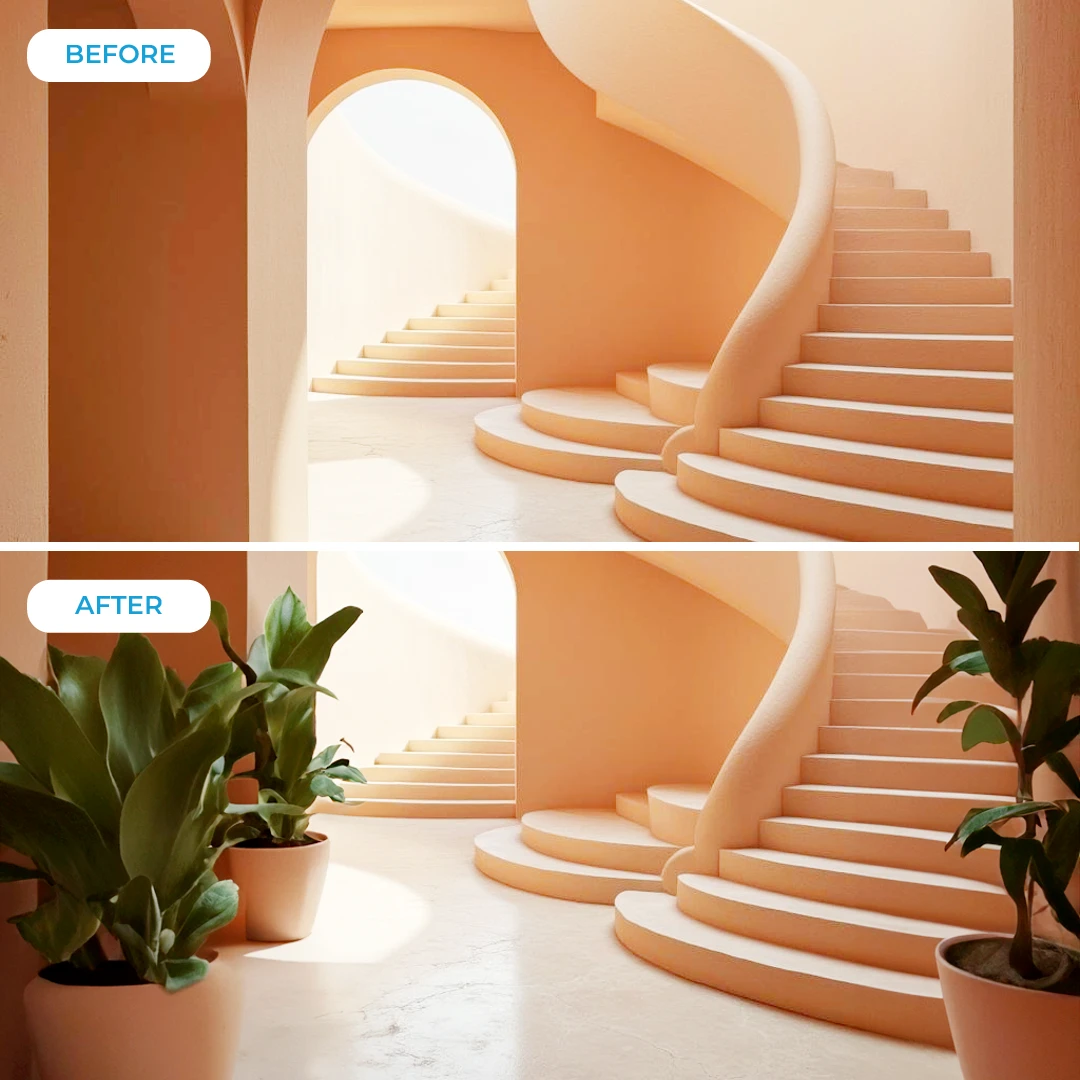
Use AI Generative Fill to improve property exteriors and experiment with multiple interior design options. By enhancing outdoor areas with landscaping, fresh paint, or architectural upgrades, you can boost a property’s curb appeal and make it more attractive to potential buyers. Additionally, generating various design options for interiors allows clients to visualize different aesthetics, helping them make informed decisions without committing to a single style. A real estate agent might digitally improve a home’s exterior by adding greenery, while an architect could present multiple design schemes for a living room.
Use AI Generative Fill to modify and enhance images for digital ads and social media content. This helps ensure that your visuals capture attention and stand out in a crowded digital space, leading to higher engagement rates and more conversions. The benefit is more effective and shareable content. A social media team might use the tool to adjust the background of a product ad, replacing a plain setting with an eye-catching one that better aligns with the brand’s message.
Absolutely yes. Pixlr’s Generative Fill tool has a very intuitive interface, and you can add, remove, or modify objects in your image with simple selection tools and text prompts.
Depending on the image resolution and the complexity of the prompt, it usually takes a few seconds to less than a minute for the AI Generative Fill tool to produce results.
Yes. The AI looks at the surrounding content to make sure the fills blend in smoothly and look natural. It keeps the original image's texture, color, and detail.
Pixlr AI Generative Fill can handle up to 5000x5000 pixels. This allows for detailed and high-quality edits, even on large images.
No. Pixlr’s AI Generative Fill keeps the original quality as well as the detailing of your images.
Pixlr AI Generative Fill is an easy-to-use alternative to Photoshop. Although Photoshop has more advanced features and customization options, Pixlr is easier to use and more accessible.
Unfortunately, No. Pixlr’s AI Generative Fill tool takes 1 AI credit for each prompt that you generate.
Absolutely Yes. Pixlr doesn’t share your edited photos in the public library unless you give them permission to.